|
Your windows are your viewing gateway to the outdoors. Having clean and streak-free windows makes a difference in the vision and brightness in your home. How many times have you cleaned your windows and then asked yourself, how could you have gotten the windows cleaner and streak-free? Cleaning windows can be frustrating if you do not achieve the clear windows you want. As you search for answers, there are some simple things you can do when cleaning your windows that will give you the clarity and view from your windows that you want. You can choose to use traditional methods for window cleaning with window cleaning chemicals. You also have the option of using a steamer for windows to effectively and efficiently clean your windows. Steam cleaners also offer the benefit of disinfection. Any way you choose, by following a simple and effective window cleaning process and tips, you can achieve the clean windows you desire.  Traditional Window Cleaning Items For Cleaning Windows There are few things you can gather to prepare for cleaning windows.
Cleaning your windows is an ongoing process. If you notice smudges, fingerprints, dog marks or other dirt on your windows, take a quick moment to clean them off. You can spot clean those with warm tap water or a commercial steam cleaner. Rotate the cloth on the glass if you are cleaning multiple spots. Deep cleaning windows every two to three months can be best. How often you clean is dependent on the dirt, dust and pollen levels in your area. If you live on a dirt road, your exterior windows will get dirty quicker, and require more frequent cleaning. Do a cleaning comparison for yourself. Clean two windows that are side-by-side. Clean the interior of one and then the interior and exterior of the other. See if there is a difference in the clarity of the glass. This can help you develop your cleaning schedule for the interior and exterior windows in your house. Your family and your house plants will appreciate the sunshine that clean windows deliver. Many homeowners that live in a cold climate clean their exterior windows in the fall and spring. Spread the Cleaning Out Do not feel that you have to tackle all of your windows in one cleaning session. If you clean the windows in two to three rooms at a time, it may not seem like such a large cleaning project. Clean Windows on a Dry and Cloudy Day Choosing best commercial steam cleaners will make all the difference with windows. The sun will heat up the surface of your windows. This will cause the cleaning agent to dry before you have a chance to wipe it off. This will cause streaks to appear on the window. You will not win this battle. Choosing an overcast day or the shady part of your house for your window cleaning day is the way to clean. This will yield clean and streak free windows. 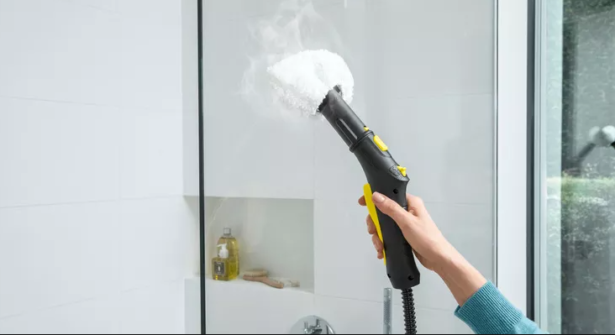 Cleaning Exterior Windows Mix a cleaning solution of 50/50 vinegar and water in a bucket. Use a clean sponge with this natural and water-based solution to loosen and free the grime and dirt from the window surface. Clean the window from top to bottom with a back-and-forth cleaning motion. Promptly after, use a squeegee to remove any excess water from the glass surface. A squeegee can often leave window streaks. Use a spray bottle with the vinegar and water mixture to finish the cleaning. Spray the solution on the glass and wipe with a back-and-forth motion on the glass surface. Use a microfiber cloth for this step until the window is dry. For stubborn stains around the base or molding, you can clean them with a brush or old toothbrush. Follow up with a cloth around the area for a 100% complete clean. Clean the Window Screen Remove the window screen if possible and spray with a garden hose. Run a sponge or cloth over the window screen with dish soap or the cleaner of your choice. Rinse and let air dry. Be sure to thoroughly clean your sponges after your cleaning is complete so they are ready for your next cleaning job. This also helps prevent household chemicals from being mixed if you clean with a different agent in the future. Cleaning Interior Windows When steamer for windows, you have to be careful of the surrounding areas including the walls. Before you start cleaning the actual windows, use a vacuum to free the window sills and surrounding areas of dirt and dust. This will inhibit the loose dirt from mixing with your cleaning solution and creating a muddy substance. Remove the window coverings if possible. If you have drapes, clean them according to the instructions. For blinds, clean both sides with a microfiber cloth or duster. You can also clean each slat individually with a damp cloth followed up by a dry wipe. If you have plants on your floors or furniture near your windows, you may want to move them prior to cleaning. Use your vinegar and water mix in a spray bottle to generously spray on the window. Spray the window you want to clean top to bottom. Clean one window at a time. Wipe the window in a back-and-forth motion with a microfiber cloth. If you do not have a microfiber cloth, use a medium fiber absorbent cloth to clean the dirty window. Select brands of paper towels can also work. If you still see streaks or the window needs a touch up cleaning, use a lighter mist spray with your cleaning solution. Go over the area with a dry cloth. As well as spectacular ways to remove a sticker from car paint. 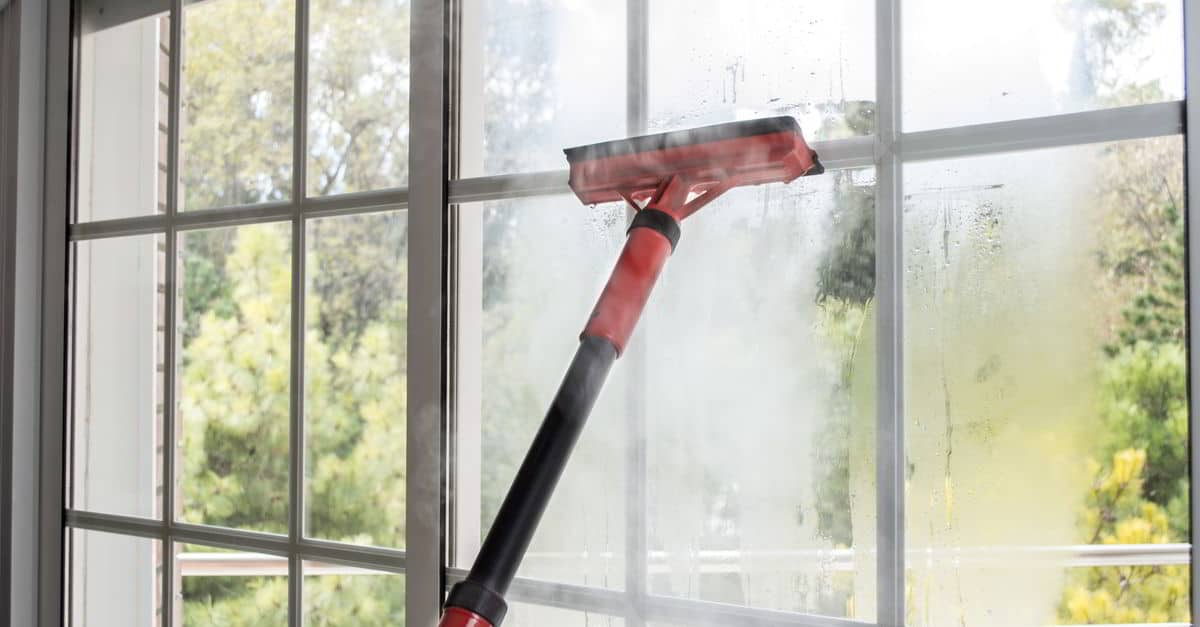 If you do not want to use the vinegar and water solution, you can use a commercial cleaner for windows. There are many liquid or aerosol cleaning agents to choose from. Find the best one to clean your windows. To put the finishing touches on your cleaning job, take a soft or microfiber cloth and polish the glass. This final cleaning step will remove any smudges or smears that may still be on the glass. Cleaning Film from Windows Smoke and other contaminates can form on your steamer for windows. The way to clean window film does not significantly differ from the window cleaning tips we detailed above. For effectively cleaning the film from windows, you will have to rotate your cleaning cloth frequently. Film can be a thicker and a more stubborn grime on glass. If you do not rotate your cleaning cloth frequently, it will cause multiple layers of smudges and streaking dirt on the glass. To Clean with Newspaper or Not Newspapers can be used to clean windows as well as do not leave behind fibers that some cloths can. Newspapers can also be stronger than paper towels. You may find ink residue on your hands after using a newspaper. There are also some newspapers that use oil-based ink that may leave a residue on your windows. If that happens, steam can easily remove that residue. Steam Cleaning for Windows A great way to steamer for windows is to use steam. You get the same results as professional cleaning services. With your own machine, you will save money. Steam vapor delivered at a high temperature will result in streak-free windows. You will also find that using steamer for windows is very efficient. Steam cleaning lets you achieve the results you want the first time in fewer steps than traditional windows cleaning methods. Using Straight Steam as a Cleaner The first step in steamer for windows is to load your water in the steam cleaner reservoir. You can fill with tap water to steam the glass surfaces as long as your water does not have a high mineral content. If it does, you can fill with distilled water. You do not have to use hot water. Search out a power source, and you are ready to go. You can use a handheld steamer or a portable steam cleaner. There are high quality steam cleaners on the market. Do not steam clean cold windows? The heat could crack the window. Set your steam cleaning machine for low pressure steam. This steam setting will allow for less moisture. It is not necessary to use an attachment. Use steam to pass over the glass surfaces from top to bottom. Let the steam do its work. The steam will remove dirt, grime and bacteria. Wipe the window clean with a microfiber cloth in a side-to-side motion. You will immediately see that the window is cleaner. There will be no streaks on your clean windows because steam cleaners do not use any household chemicals. If there is any residual moisture on your steam-cleaned window, it will simply evaporate.  Steam Cleaning With a Squeegee Tool
Some steam cleaning machines may come an attachment assortment. This could include a squeegee or window cleaning attachment. If your machine has a squeegee, you can use it to steamer for windows. Determine which method works best for you to steam clean. Use one side of the squeegee tool to steam the window. The steam will roll from the machine, cleaning as it is delivered. Move the steamer from top to bottom on the glass surfaces. Turn the squeegee attachment over and squeegee the moisture from the window surfaces. Use the same top to bottom motion. If there are areas, such as under a handle that the squeegee could not reach, use a cloth to wipe the excess steam. The squeegee steam cleaning method is a way to clean that will yield similar results to using a cloth to wipe. Benefits of Steam Cleaning with a Machine There are multiple benefits of steam cleaning your windows.
0 Comments
There are many reasons people need to remove vinyl stickers and graphics from their car, truck, other vehicle or on a business building. Graphics need updating, a business name changes, a new phone number, a new logo, selling a company vehicle or an expanded service area are just a few reasons people need to remove vinyl stickers. The most common application for removal is on vehicles. We will focus on that, but the techniques are the same for removing vinyl letters, numbers and graphics from most any surface. There is no need to use and expose yourself to harsh chemicals. A automotive steam cleaner is the best solution. A professional steam cleaner has the capability to effectively and efficiently remove almost any vinyl sticker and the adhesive that bonded it to the surface. 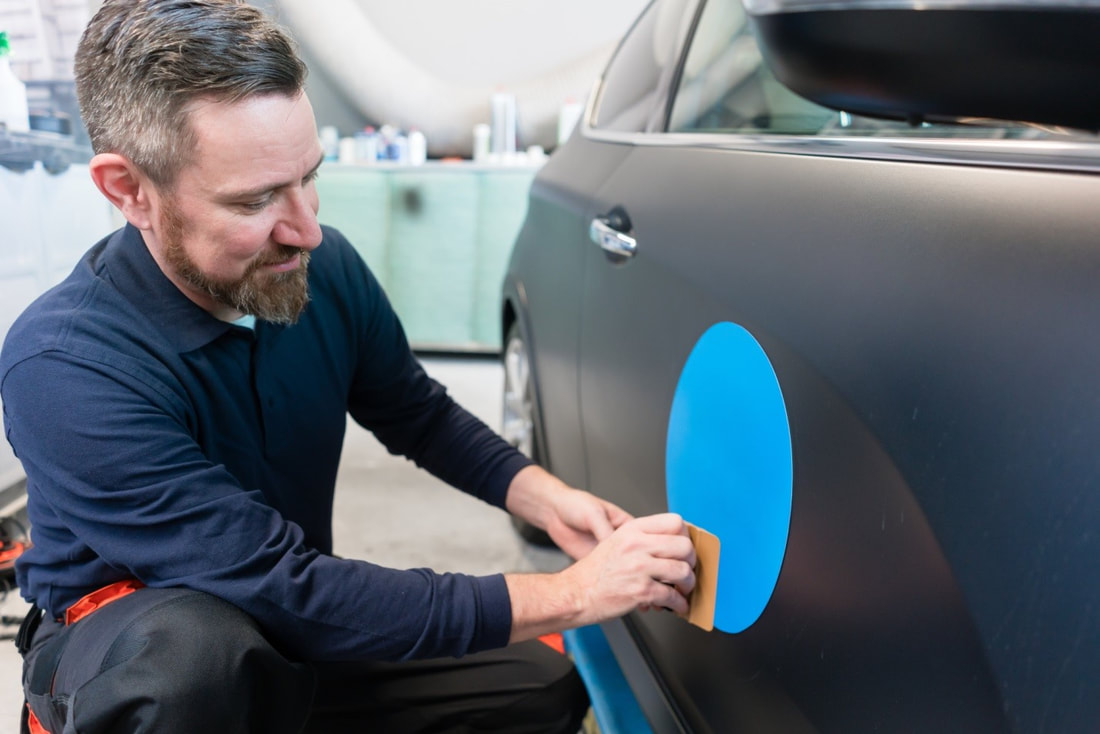 Vinyl Material Preservation When Using Steam Another advantage of using steam for vinyl sticker removal is that you may be able to preserve the material. Beyond letters and numbers, some business owners may have invested a larger sum of money in design and material. He or she may want to adhere the removed vinyl work on a different vehicle. Inform the customer that you will do your best to preserve the vinyl, but you really cannot guarantee anything until you start working with the material. Some thinner vinyl pieces simply crack. Age and weather exposure can play a role. For larger pieces of vinyl and graphics that you need to remove and preserve, you may have to work with a partner for optimum and consistent tension and steam. About more information professional steamer car detailing. It is Time to Remove the Vinyl Stickers and Graphics Begin to apply steam to the first letter or graphic. Focus on one object at a time. As you direct the steam at the vinyl, leave it on the area for about five seconds. This activity will soften the vinyl. Carefully lift up the corner of the vinyl with a plastic putty knife. Grasp the corner between your fingers, and continually apply tension on the vinyl. Slowly lift up the vinyl between a 30 and 45-degree angle. This will help prevent tearing. You can also remove vinyl striping and trim work with this method. The vinyl material and its bonding agent will be removed. If you notice some of the bonding agent remaining, adjust your technique for the next piece of vinyl to minimize this residue. You can adjust your steam-time, the angle you pull at the vinyl object and steam temperature. With the many adhesives and bonding materials on the market, five to seven degrees in the steam can make a difference. 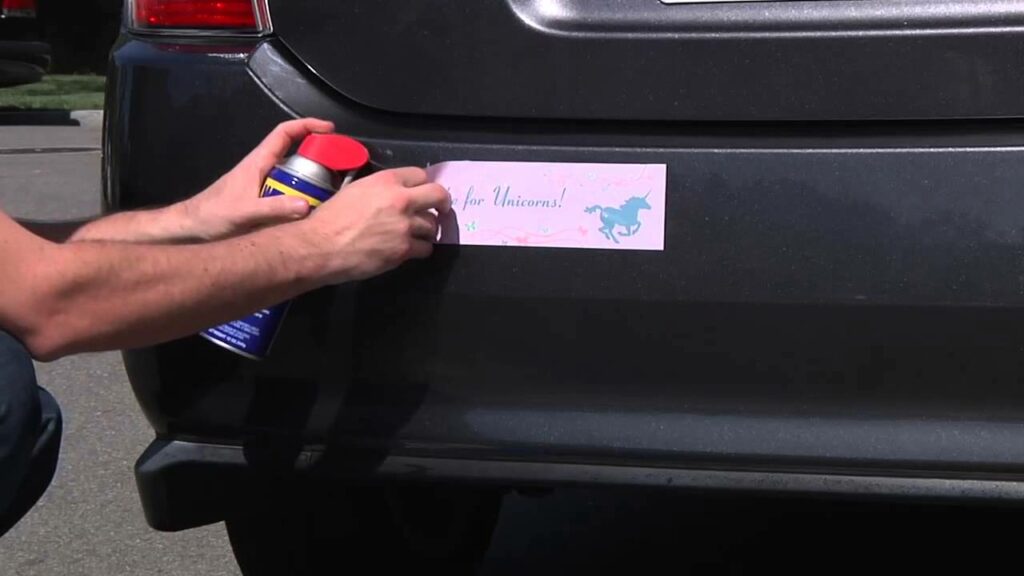 Wipe off any excess moisture with a microfiber cloth. If you have bonding residue that needs to be removed, use a solvent. Try the solvent on an out-of-sight portion of the car, truck or van. Make sure it does not harm the paint. Most solvents require you to leave them on the surface for one to two minutes. Sometimes simple Windex can work. A job with a fewer number of larger vinyl graphics will go quicker than multiple smaller letters, numbers and symbols. Different Types of Vinyl Stickers There are many types of vinyl stickers and graphics on the market. They all will behave differently in the removal process. Thin vinyl graphics are the easiest to remove. Some UV-resistant and digitally printed vinyl graphics can be little tougher to remove. You will easily learn how to slightly adjust your vinyl sticker removal technique based on the material. 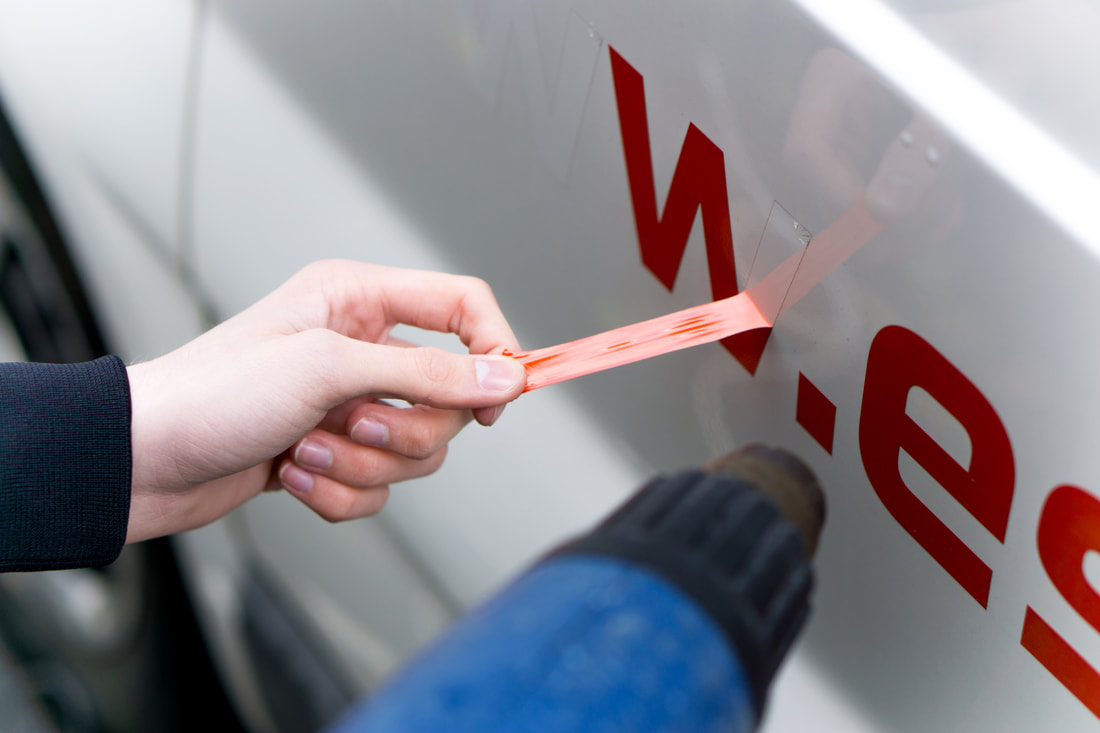 Things to Gather to Remove Vinyl Stickers
If you are working on a vehicle, prepare your area so you have enough space to work around the car or truck. Work with adequate lighting; performing your work in the day if possible. This will allow you to see any residual adhesive that you need to address. Let your steamer warm up so it delivers steam at around 200-degrees Fahrenheit. Choose the proper nozzle that delivers the powerful steam in a small and concentrated area. Be careful not to burn your hand when working close to the steam. Test on a Low-Profile Area Locate an area on the vehicle to test your technique. You want to ensure it is safe for the surface. Doing so will give you and the owner confidence to move forward. Commonly Asked Questions About Removing Vinyl Stickers Q. What is the easiest way to remove permanent vinyl? A. Most people choose vinyl because it is durable and will last. Because of that, a heat source around 200 degrees Fahrenheit is a very efficient and effective way to remove them. Use steam, start the edge with a plastic putty knife, and slowly peal back at a 30 to 45-degree angle. Q. How do you remove stubborn vinyl decals? A. There are few options including using a solvent. Most people use heat. Heat delivered from a hair dryer is most often not hot enough. Using a steam cleaner will soften the vinyl and deliver consistent results in a short time. Q. Can you remove stickers with steam? A. Absolutely! Using a steam cleaner is one of the best ways to remove stickers on almost any surface. It is a simple process and chemical-free. Q. How do you remove vinyl stickers? A. When removing vinyl stickers, you more than likely want to preserve the surface you are removing them from. Chemicals can often harm or scratch surfaces. Using steam with the proper nozzle is the best way to remove vinyl stickers. |
Lev Tretyakov
Fortador is a European manufacturer of Best in class Mobile or stationary steam cleaner for Professionals. |
 RSS Feed
